
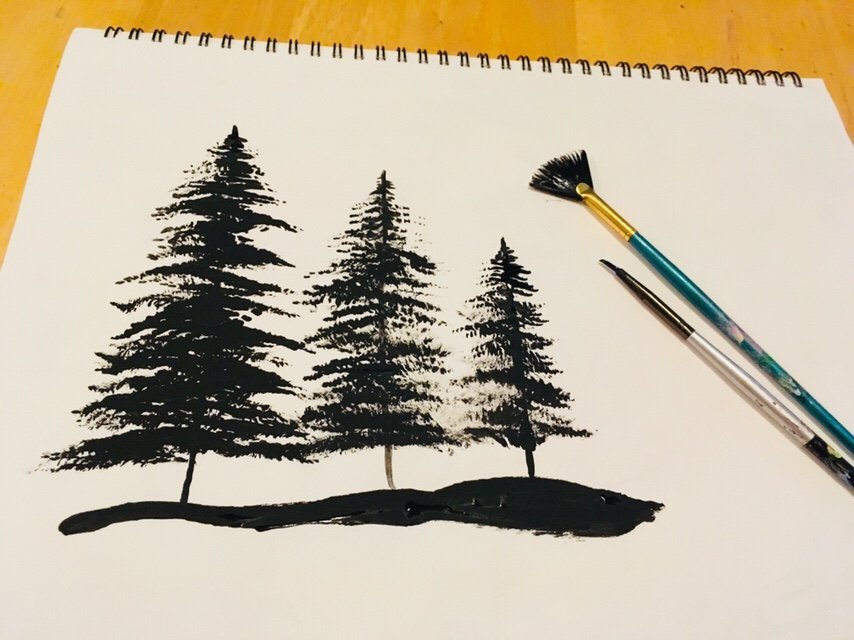
To paint a pine tree, begin by selecting the right shades of green and brown on your palette. Use a fan brush to create the distinctive pine needle effect, starting from the trunk and working your way up. Layer different tones for depth and texture, capturing the tree’s unique character and form. Embrace the natural beauty of a pine tree on canvas with each careful stroke. Let’s dive into the step-by-step guide on how to paint a pine tree and bring the serene charm of the forest into your artwork.

How to Paint a Pine Tree: A Step-by-Step Guide for Beginners
Are you ready to unleash your inner artist and learn how to paint a beautiful pine tree? Whether you’re a complete beginner or looking to improve your painting skills, creating a stunning pine tree on canvas can be a rewarding and enjoyable experience. In this comprehensive guide, we will walk you through the process of painting a pine tree step by step. So grab your paintbrushes and let’s dive in!
Materials You’ll Need:
Before we start painting, let’s gather all the necessary materials. Here’s what you’ll need:
- Acrylic paints in shades of green, brown, and white
- Canvas or painting paper
- Paintbrushes in various sizes (small for details, larger for filling in colors)
- Palette for mixing colors
- Cup of water for rinsing brushes
- Pencil for sketching the outline
- Reference image of a pine tree (optional)
Step 1: Sketch the Outline
Start by lightly sketching the outline of your pine tree on the canvas using a pencil. You can draw a simple triangle shape with a slightly uneven bottom to represent the tree trunk. Then, add long, thin lines extending from the trunk to outline the branches of the pine tree.
Don’t worry about making it perfect at this stage, as the sketch will be covered by paint later on. This step is just to give you a rough guide of where to paint.
Step 2: Paint the Tree Trunk
Using a small paintbrush and brown acrylic paint, carefully fill in the trunk of the pine tree. Start from the base and work your way up towards the branches. You can add some darker shades of brown to create depth and texture on the trunk.
Remember to use light brush strokes and take your time to ensure a smooth and even application of paint. The tree trunk is the foundation of your pine tree, so make sure it looks sturdy and realistic.
Step 3: Add Base Coat of Green
Now it’s time to add the base coat of green to your pine tree. Mix different shades of green on your palette by combining blue and yellow with a touch of white. Using a larger paintbrush, apply the green paint to the branches of the tree.
Start from the center of the tree and work your way outwards towards the tips of the branches. Leave some spaces between the branches to create a sense of depth and dimension in your painting.
Step 4: Define the Branches
To make your pine tree look more realistic, it’s important to define the individual branches. Take a smaller paintbrush and dip it in a darker shade of green. Carefully outline the edges of the branches and add some details to create a textured look.
You can also use a technique called “dry brushing” to create a rough texture on the branches. Simply dip a dry brush into a small amount of paint and lightly brush it over the branches to add depth and dimension.
Step 5: Highlight with White
To add a final touch of realism to your pine tree, use a small brush and some white paint to highlight the tips of the branches. This will create a subtle contrast and make the tree look more vibrant and lifelike.
Be careful not to overdo it with the white highlights – a little goes a long way. Focus on the outer edges of the branches and the top of the tree to mimic the effect of sunlight hitting the leaves.
Tips for Painting a Pine Tree:
Here are some additional tips to help you paint a beautiful pine tree:
1. Study References:
Take a look at pictures of pine trees to observe the different shapes and textures of the branches. This will help you create a more realistic painting.
2. Practice Layering:
Don’t be afraid to layer different shades of green to create depth in your painting. Experiment with blending techniques to achieve a natural look.
3. Play with Light and Shadow:
Adding highlights and shadows to your pine tree will make it look more three-dimensional. Pay attention to where the light is coming from and adjust your painting accordingly.
4. Have Fun and Experiment:
Painting is a creative process, so don’t be afraid to try new techniques and styles. Let your imagination guide you and have fun with your artwork.
With these step-by-step instructions and helpful tips, you’re well on your way to painting a stunning pine tree masterpiece. Remember to practice regularly and don’t get discouraged by mistakes – they’re all part of the learning process. Happy painting!
4 TECHNIQUES to paint pine trees » EASY WATERCOLOR trees for beginners step by step tutorial
Frequently Asked Questions
How do I start painting a pine tree?
Begin by sketching the basic shape of the pine tree using a pencil on your canvas. Focus on outlining the overall form of the tree, including its trunk and branches.
What colors should I use to paint a realistic pine tree?
For a realistic look, use a mix of green shades for the pine needles, and browns for the trunk and branches. Consider adding hints of blue or gray for depth and shadows.
How can I create texture when painting pine tree branches?
To create texture on pine tree branches, use a dry brush technique with a mix of greens and browns. Lightly dab the brush to mimic the look of pine needles and add depth to the branches.
What tips can help me add dimension to my pine tree painting?
To add dimension, vary the tones of your greens and browns to create highlights and shadows. Focus on adding depth to the tree by layering different shades and adding details to the foliage.
Final Thoughts
To paint a pine tree, first, sketch the basic shape with a thin brush. Use varying shades of green to create depth and texture. Add highlights with a lighter green or white to bring the tree to life. Remember to layer colors and strokes to achieve a realistic look. Practice and experimentation are key to mastering how to paint a pine tree.


